A healthy CPU fan is vital for your computer’s well-being. It keeps your processor cool, preventing overheating and potential damage. Asus motherboards, like many others, are designed to detect fan malfunctions and alert you with a “CPU Fan Error” message during startup. This message serves as a crucial warning, prompting you to address the issue before your CPU suffers the consequences. This guide delves into troubleshooting this error on Asus motherboards. We’ll explore four key areas to investigate, providing solutions to get your system running smoothly again.
Part 1: Verifying the Fan Connection
Physical Check:
The most common culprit behind a CPU fan error is a loose or disconnected fan cable. Power down your computer completely and unplug it from the power source. Open the case and locate the CPU fan connector, typically labeled “CPU_FAN” or similar. Gently but firmly ensure the fan cable is securely plugged into this header on the motherboard. Double-check for any bent pins that might hinder proper connection.
Connector Confusion:
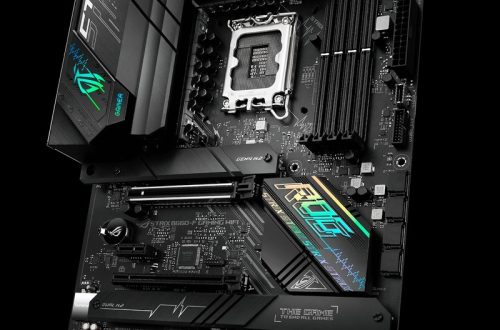
When addressing CPU fan issues on an Asus motherboard, it’s crucial to understand the role of fan headers and ensure proper connectivity. Asus motherboards typically feature multiple fan headers, each serving different purposes. The “CPU_FAN” header is specifically dedicated to the CPU cooler, while other headers such as “CHA_FAN” are intended for case fans. During troubleshooting, it’s essential to verify that the CPU fan cable is plugged into the correct header to accurately relay fan speed and control data to the motherboard.
Consulting your motherboard manual for a precise layout of the fan headers is highly recommended. The manual provides detailed information about the specific functionalities and assignments of each fan header, enabling you to confirm the accurate connection of the CPU fan. By ensuring that the CPU fan is connected to the designated “CPU_FAN” header and not inadvertently linked to a different fan header, you can prevent communication issues and promote efficient cooling performance for your CPU within the Asus system.
Part 2: Examining Fan Functionality
Visual Inspection:
When troubleshooting CPU fan issues on an Asus motherboard, it’s essential to physically inspect the CPU fan and its components. Before proceeding, ensure the computer is powered off and the case is open. Gently spin the CPU fan blade manually, observing its movement. The fan blade should rotate freely without any resistance or grinding noise. If there’s any stiffness or unusual sounds, it may indicate mechanical issues with the fan, warranting further investigation or potential replacement.
Additionally, examine the fan blades and the heatsink fins for any accumulation of dust or debris. Dust buildup can impede airflow and hamper the fan’s performance, leading to inadequate cooling. If visible dust is present, use a can of compressed air to gently clean the fan blades and heatsink fins, removing any obstructive particles to restore optimal airflow and cooling efficiency.
By performing these visual and manual checks, you can identify and address potential mechanical or cleanliness issues affecting the CPU fan’s operation, ensuring effective cooling performance within your Asus system.
Alternative Testing:
If the fan seems stuck, you can attempt to jumpstart it. Disconnect the fan cable from the motherboard and locate the 12V and ground wires (usually black and red). Briefly touch these two pins with a small metal object like a screwdriver (while the system is off!). If the fan spins momentarily, it’s likely functional. However, a faulty motherboard connection or a failing fan itself could still be the culprit. Important Note: Perform this step with caution, as an incorrect connection could damage the fan or motherboard.
Part 3: Exploring BIOS Settings
Ignoring the Error (Temporary Fix):
If you’ve confirmed the fan connection and functionality seem alright, you can temporarily bypass the error message through BIOS settings. This allows your system to boot but isn’t a permanent solution. Access your BIOS by pressing the designated key during startup (usually DEL, F2, or Esc). Navigate to the “Monitor” or “Fan Control” section and look for a setting related to “CPU Fan Speed.” Here, you might find an option to “Ignore” the fan speed. Save the changes and exit BIOS.
Adjusting Fan Curve (Advanced Users):
For users comfortable with BIOS settings, you can adjust the CPU fan curve. This dictates the fan speed based on CPU temperature. Locate the “Q-Fan Control” or similar setting and ensure it’s enabled. You can then adjust the fan curve to ensure the CPU fan ramps up sufficiently at higher temperatures. Refer to your motherboard manual for specific instructions on navigating these settings.

Part 4: Addressing Hardware Issues
Faulty Fan:
If the previously attempted troubleshooting steps have not resolved the CPU fan error on your Asus motherboard, it is possible that the fan itself is malfunctioning. In such a scenario, it may be necessary to consider replacing the CPU fan with a compatible model that meets the requirements of your system.
When selecting a replacement fan, it is crucial to ensure compatibility with your specific CPU and motherboard. Verify that the new fan is compatible with the socket type of your CPU and that it aligns with the specifications outlined by the motherboard manufacturer. Additionally, pay attention to the fan’s RPM (rotations per minute) to ensure that it meets the cooling requirements of your CPU. Adequate airflow and cooling performance are essential, so selecting a replacement fan with appropriate RPM specifications is vital for maintaining optimal operating temperatures for your CPU.
By carefully selecting a compatible replacement CPU fan and confirming its adherence to the system’s requirements, you can address the malfunctioning fan and reinstate efficient cooling for your Asus system.

Motherboard Problem:
In rare cases, the issue could lie with the motherboard’s fan header. If none of the above solutions work, consult your motherboard’s warranty information and consider contacting Asus support for further assistance.
By following these steps systematically, you should be able to identify and rectify the cause of the CPU fan error on your Asus motherboard. Remember, a functional CPU fan is essential for system stability and component longevity. If you’re unsure about any step or uncomfortable opening your computer, seek help from a qualified technician.


