Introduction to GPU Installation
Upgrading your computer with a new graphics processing unit (GPU) can significantly boost its performance, especially in graphics-intensive tasks. Whether you’re a gamer seeking smoother frame rates, a professional working with complex visual rendering, or simply aiming for a better multimedia experience, knowing how to install a new GPU is essential. In this guide, we will walk you through the steps of a successful GPU installation.
Before diving into the process, it’s important to understand what a GPU does. A GPU is a specialized processor designed to accelerate the creation and rendering of images, video, and animations. It’s a critical component for anyone looking to enhance their computer’s visual output. This post aims to provide you with a clear, step-by-step guide on how to install a new GPU, ensuring that even novices can approach the task with confidence.
Remember that while the physical installation of a GPU is important, the software setup is equally critical for optimal performance. Following the correct procedures can prevent common installation issues. Do read on, as we have also included a section on troubleshooting common installation problems, so you’re well-equipped to handle any hiccup that may arise during the process.
Preparing for GPU Installation
Before you start the installation process, preparation is key to ensure everything goes smoothly. Proper preparation not only prevents potential damage to your new GPU but also makes the installation process more efficient. Below are the steps you should take to prepare for installing your new graphics processing unit.
Checking System Compatibility
The first and most crucial step in preparing for a GPU installation is to check system compatibility. Here’s what you need to look out for:
- Motherboard Compatibility: Verify that the motherboard has the appropriate PCIe slot for your new GPU.
- Power Supply: Ensure that your power supply unit (PSU) can handle the wattage requirements of the new GPU. Check the PSU’s wattage and the GPU’s power consumption specifications.
- Case Size: Confirm that the GPU fits inside your case, considering its length, height, and thickness.
- BIOS: Check if your BIOS needs an update to support the new hardware.
- System Software: Make sure your operating system is up to date to avoid any compatibility issues with drivers.
Gathering Necessary Tools
Once compatibility is confirmed, gather the tools required for the installation. This typically includes:
- Screwdriver: A Phillips-head screwdriver usually suffices for mounting screws.
- Anti-static Wrist Strap: To prevent electrostatic discharge that can damage computer components.
- Clean Workspace: Set up in a well-lit, clean, and spacious area to work.
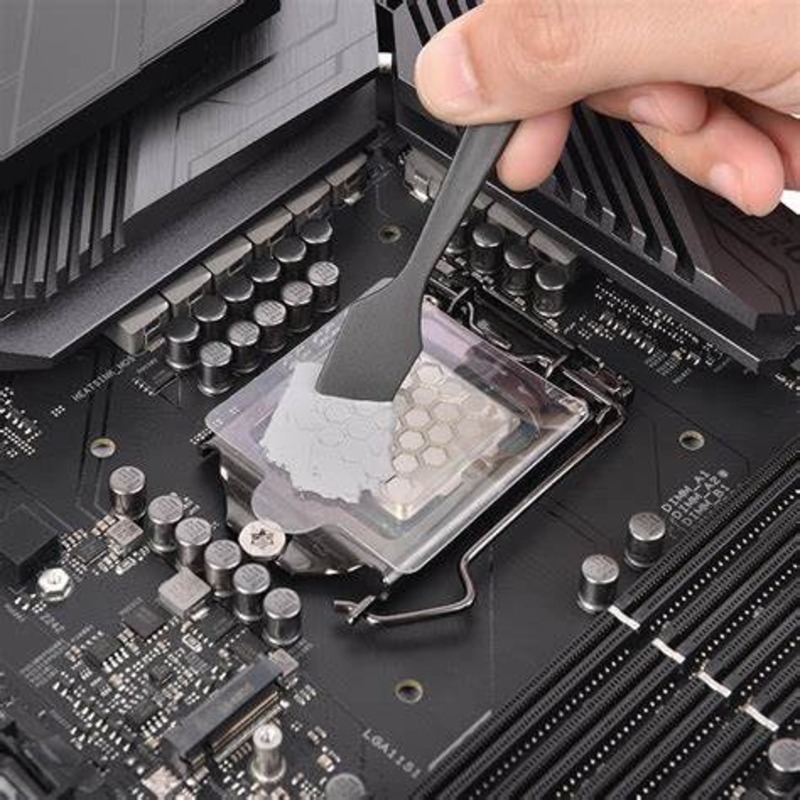
- Thermal Paste: If applicable, have thermal paste on hand for GPUs that require direct cooling solutions.
Equip yourself with these tools and the above knowledge on compatibility, and you’re ready to remove your old GPU if necessary and proceed with the installation.
Removing the Old GPU
If you are upgrading from an existing GPU, removal of the old card is necessary. This process is simple if you follow these steps carefully to avoid damaging your system.
Powering Down and Opening the Case
Firstly, turn off your computer. Unplug all the power cables and all other cables connected to your computer. Once turned off, press the power button once more to discharge any remaining electricity. Then, ground yourself to prevent static electricity from damaging the parts – wearing an anti-static wrist strap is recommended. Now, remove the side panel of your computer case to gain access to the internals. Use your screwdriver if screws are holding the panel in place.
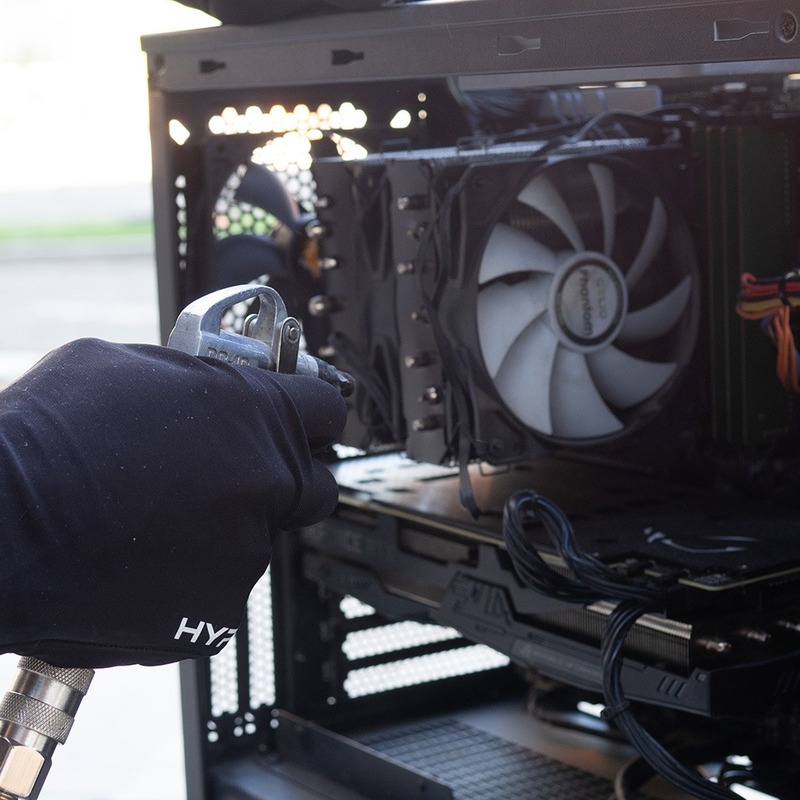
Detaching the GPU Safely
Locate your old GPU within the case, which is typically attached to the motherboard via a PCIe slot. Begin by disconnecting any power connectors from the GPU. Then, unscrew any screws anchoring the GPU to the case. Carefully release any retaining clips on the PCIe slot and gently pull the GPU out by holding it from the top and sides—avoid touching the circuits and connectors. Make sure to keep the old GPU in a safe place, especially if it’s still functional or you plan to sell it.
Installing the New GPU
Now that you have prepared your system and removed the old GPU, it’s time to install the new one. Follow these steps to ensure a smooth installation process.
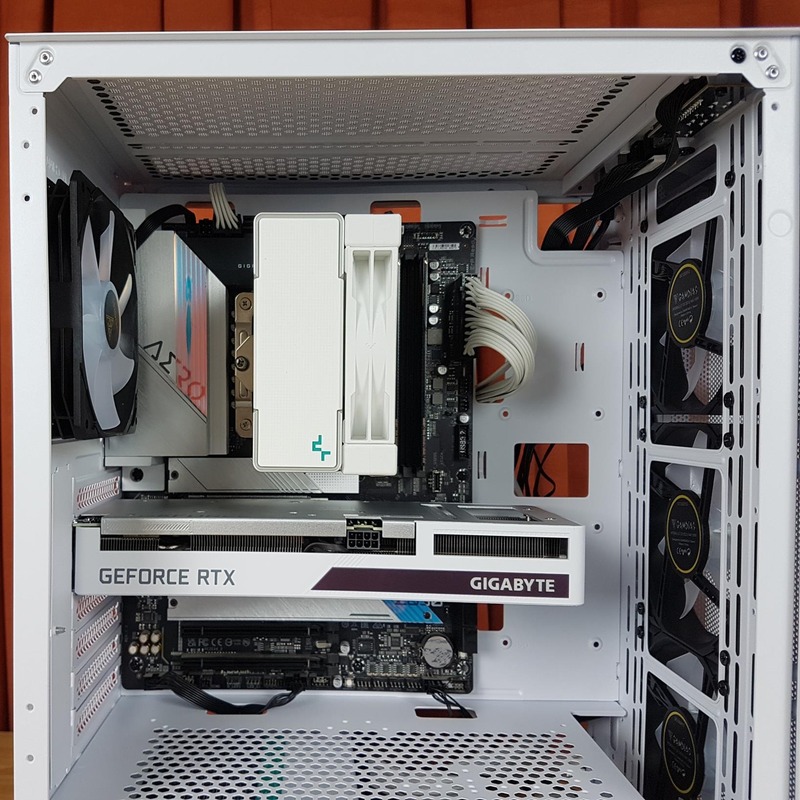
Securing the Graphics Card in the Slot
First, identify the appropriate PCIe slot on the motherboard for your new GPU. It’s usually the slot closest to the CPU with the most lanes. Hold the GPU by its edges and align it with the slot. Press down evenly and firmly until the card seats securely. You should hear a click as the PCIe slot latch locks the card in place. Fasten the card to the case with screws to prevent movement.
Connecting the Power Supply
Your new GPU may require direct power from the PSU. Locate the PCIe power connectors on your GPU, and plug in the required cables from the PSU. Make sure the connectors fit snugly and there’s no wobble. Cable management is key here; route the cables neatly to maintain good airflow within the case.
Ensure you’ve securely completed these physical connections. Proper installation reduces the chance of issues and helps the GPU function at its best.
Software Setup for the New GPU
Once you have installed your new GPU physically, the next crucial step is the software setup. Proper installation of drivers and software is indispensable to ensure that your new GPU operates effectively and provides the best performance.
Installing Drivers and Software
After successfully seating your new GPU, it’s time to install the necessary drivers. Drivers are essential software that allow your operating system to communicate effectively with the new hardware. Here is what you should do:
- Operating System Update: Make sure your operating system is up to date for maximum compatibility with your new GPU.
- Install Brand-Specific Drivers: Visit the official website of your GPU manufacturer, such as NVIDIA or AMD, to download the latest drivers. Avoid using the disc that may have come with your GPU, as it likely contains outdated software.
- Installation Process: Execute the downloaded driver file and follow the on-screen instructions to install. A system restart may be required.
- Driver Updates: Regularly check for driver updates to maintain optimal performance and enjoy improvements and bug fixes.
Adjusting Display Settings
With the drivers installed, you can fine-tune your display settings to suit your preferences and make the most of your GPU’s capabilities:
- Right-click on the Desktop: Access display settings by right-clicking on your desktop and selecting the display settings option.
- Resolution and Refresh Rate: Adjust the screen resolution and refresh rate to match the capabilities of your monitor and new GPU.
- Advanced Settings: Explore advanced graphics settings to adjust color depth, digital vibrance, and other GPU-specific options.
- Monitor Arrangement: For multi-monitor setups, configure the display order and orientation as per your liking.
By following these steps, you ensure that your GPU is not just installed, but also fully operational and delivering its intended performance. Remember to save all changes, and enjoy the enhanced visual experience provided by your new investment.Learn how to install a new GPU with our guide. Step-by-step instructions, tip, and troubleshooting advice for a smooth graphics card upgrade.
Troubleshooting Common GPU Installation Issues
Even with careful preparation and installation, you may encounter issues with your new GPU. Here are common problems and how to fix them:
GPU Not Detected by the System
- Re-seat the GPU: Make sure the card is firmly seated in the PCIe slot.
- Check Power Connections: Ensure all required power connectors are properly attached.
- Inspect PCIe Slot: Try another slot if available to rule out a faulty PCIe slot.
Display Not Working After Installation
- Check Monitor Connection: Confirm the monitor is connected to the GPU, not the motherboard.
- Try Different Cable/Port: Use another cable or port to identify any faulty connection.
- Clear CMOS: Reset the BIOS settings to default by clearing the CMOS.
System Boot Issues
- Check Compatibility: Ensure your GPU is compatible with your system’s hardware and BIOS.
- Update BIOS: If the GPU is new, an outdated BIOS may need an update.
- Diagnose Beep Codes: Listen for beeps during startup, indicating hardware issues.
Driver Conflicts or Errors
- Use Safe Mode: Boot in Safe Mode to uninstall old drivers and install new ones.
- Clean Driver Installation: Use tools like ‘Display Driver Uninstaller’ for a fresh driver install.
- System Restore: If issues persist, a system restore can revert to settings before the install.
Poor Performance or Crashing
- Update Drivers: Make sure you have the latest drivers from the GPU manufacturer.
- Check for Overheating: Make sure the GPU cooling system is working properly.
- Adjust Graphics Settings: Lower graphics settings in games or applications for stability.
By addressing these common issues, you can ensure your new GPU operates smoothly. If problems persist after following these steps, consider reaching out to the GPU manufacturer for further support.Learn how to install a new GPU with our guide. Step-by-step instructions, tip, and troubleshooting advice for a smooth graphics card upgrade.
Finalizing and Testing the Installation
After installing your new GPU both physically and in software, the final steps are to ensure everything is working correctly. These steps are crucial to confirm that your computer is recognizing the new hardware and that it’s performing as expected. Here’s what you need to do:
Verify the GPU Installation
- System Check: Restart your computer and enter the BIOS to verify that the new GPU is recognized.
- Device Manager: In Windows, open the ‘Device Manager’ to see if the GPU lists without any warning symbols.
- GPU-Z or Similar: Use tools like GPU-Z to check if the GPU’s specs and performance align with expectations.
Conduct Performance Tests
- Benchmarking Software: Run benchmarking software to test the GPU’s performance. Look for software specifically designed for analyzing GPU efficiency.
- Stress Testing: Use stress testing tools to push your GPU to its limits and check stability.
- Real-World Testing: Finally, test your GPU with the actual tasks it’s meant for, like gaming, rendering, or video playback, and watch for any anomalies or glitches.
By carefully verifying your new GPU’s installation and then conducting thorough performance tests, you should be able to catch and rectify any issues early on. If the tests are successful and your system is stable, you can rest assured that you have successfully upgraded your PC with the new GPU. Don’t forget to regularly check for driver updates and keep your system clean for the best ongoing performance.