Introduction to GPU Maintenance
In the world of computing, a Graphics Processing Unit or GPU is a critical component. It handles complex visual tasks, making sure your games and high-resolution videos run smoothly. But, just like any other computer part, a GPU also needs regular maintenance to stay in top shape. Understanding how to clean a GPU is necessary for several reasons. First, it prevents dust and grime buildup, which can hinder performance. Second, it ensures better heat dissipation, which keeps your GPU cool during heavy loads. And finally, it helps in extending the life of your graphics card. In this section, we will walk through the basics of GPU maintenance that will pave the way for a comprehensive guide on how to clean your GPU efficiently. We will cover the importance of regular cleaning, the preparations you should make, and the steps you should follow for optimal results. Keep your toolkit ready, and let’s enhance the longevity and efficiency of your GPU together.
Importance of Regular GPU Cleaning
Keeping your GPU clean is crucial. It affects performance and longevity. Without routine cleaning, dust can accumulate, block air flow, and cause overheating. Excess heat damages components, leading to malfunctions or even total failure. Regular cleaning ensures that every part of the GPU functions correctly. By maintaining cleanliness, you prevent the build-up of insulating dust layers. This build-up can disrupt the normal heat dissipation process. It can push the GPU to work harder than necessary, shortening its lifespan. Frequent cleaning also keeps noise levels down. As dirt clogs fans, they strain to maintain proper cooling. This results in louder operation. For gamers and professionals, a well-maintained GPU ensures consistent performance. It avoids unexpected crashes or performance drops during crucial moments. In summary, regular GPU cleaning helps maintain performance, prevents damage, prolongs lifespan, and reduces noise. All these benefits highlight why understanding how to clean your GPU is vital. Let’s remember to incorporate regular GPU maintenance into our routine for a smooth computing experience.
Preparations Before Cleaning Your GPU
Before diving into the cleaning process, proper preparation is key. It will guarantee safety for both you and your GPU hardware. Here are the steps you should follow:
- Power Down: Make sure your computer is completely turned off and unplugged from any power source. This prevents the risk of electrical shock or damage to the GPU.
- Cool Down Period: Give your PC some time to cool down if you’ve been using it. Working on a hot GPU can be dangerous due to residual heat.
- Gather Tools: Collect all the tools required for the cleaning process. This may include a screwdriver, compressed air, microfiber cloths, isopropyl alcohol, and thermal paste.
- Workspace Preparation: Set up a clean, well-lit, and static-free workspace. Static electricity can damage the GPU, so consider a static wristband if available.
- Consult the Manual: Check your GPU’s user manual for specific instructions or precautions. It may provide guidance on how to remove the GPU safely from your PC.
- Take Photos: Before you remove any parts or start cleaning, take photos. They will act as a reference for how everything should fit back together afterward.
By following these preparation steps, you’ll set the stage for a smooth and safe cleaning process. Remember, being thorough in your preparations can enhance the efficiency of your cleaning, ensuring the longevity and optimal performance of your GPU.
Step-by-Step Guide to Cleaning Your GPU
Now that your workspace is prepared, let’s dive into how to clean your GPU effectively. The following walkthrough will ensure you cover all the essential steps without risking damage to your precious hardware.
- Remove the GPU: Carefully extract the GPU from the motherboard. Use a screwdriver if necessary and handle the GPU by its edges, avoiding contact with sensitive components.
- Dusting: Use compressed air to blow away dust from the GPU board and fans. Short, controlled bursts will prevent the dust from spreading around or getting deeper into the GPU.
- Cleaning the Fans: Hold the fan blades steady and use compressed air to clean the fans. Doing so prevents the fans from spinning and potentially causing damage.
- Heatsink Cleaning: A lot of dust can get trapped in the heatsink. Target these areas with compressed air, ensuring the removes all dust and debris.
- Deep Clean: For stubborn dirt, lightly dampen a microfiber cloth with isopropyl alcohol and wipe the GPU. Avoid using too much liquid to prevent damage.
- Dry Off: Let the GPU dry completely after using isopropyl alcohol. Ensure that no moisture remains before proceeding to the next step.
Throughout each stage of cleaning your GPU, be gentle and patient. Rushing or using excessive force can cause irreversible damage to the GPU components. Once the cleaning is complete, you can move on to applying fresh thermal paste for improved heat dissipation.
Cleaning the Fans and Heatsink
After removing the GPU and dusting off the surface, the next crucial steps involve cleaning the fans and heatsink. These components are significant in ensuring your GPU’s effective cooling performance. It’s vital to approach this stage with caution to avoid any damage.
Cleaning the Fans
Fans are prone to dust accumulation, which can reduce their efficiency and increase noise. Here’s how to properly clean them:
- Stabilize the Fans: Before using compressed air, hold the fan blades gently to prevent them from spinning.
- Use Compressed Air: Carefully apply short bursts of compressed air to dislodge the dust.
- Check for Blockages: Make sure there are no lingering dust particles or blockages that can impede the fan’s movement.
- Wipe with Cloth: If necessary, use a microfiber cloth with a bit of isopropyl alcohol to carefully wipe the blades.
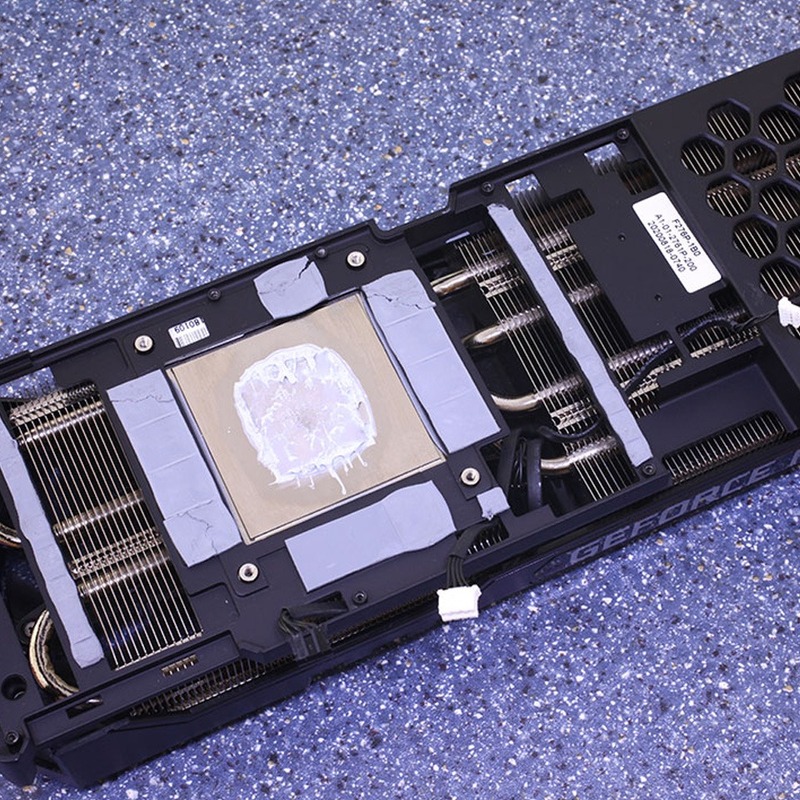
Cleaning the Heatsink
The heatsink works hand in hand with the fans to disperse heat. Dust trapped here can be more stubborn.
- Target Dusty Areas: Direct the compressed air into the fins of the heatsink to remove trapped dust.
- Gentle Brushing: Use a soft-bristled brush, if needed, to loosen any stubborn dirt.
- Double-Check for Debris: Ensure all dust and debris are completely removed from the heatsink fins.
- Final Wipe: Use the microfiber cloth dampened with isopropyl alcohol for a final wipe if the heatsink appears grimy.
By thoroughly cleaning both the fans and heatsink, you restore their function and efficiency. This not only aids in optimal heat dissipation but also prolongs the life of your GPU. Proceed to the next steps only when you are confident that these components are clean and dry.
Reapplying Thermal Paste
Once you have thoroughly cleaned the GPU, the next step is reapplying thermal paste. Thermal paste is a heat-conductive material that enhances the heat transfer from the GPU to the heatsink. Over time, the old paste can dry out and lose effectiveness, which can cause the GPU to overheat. Therefore, it’s crucial to apply a new layer of thermal paste after cleaning the GPU to ensure efficient heat dissipation. Here’s how to do it:
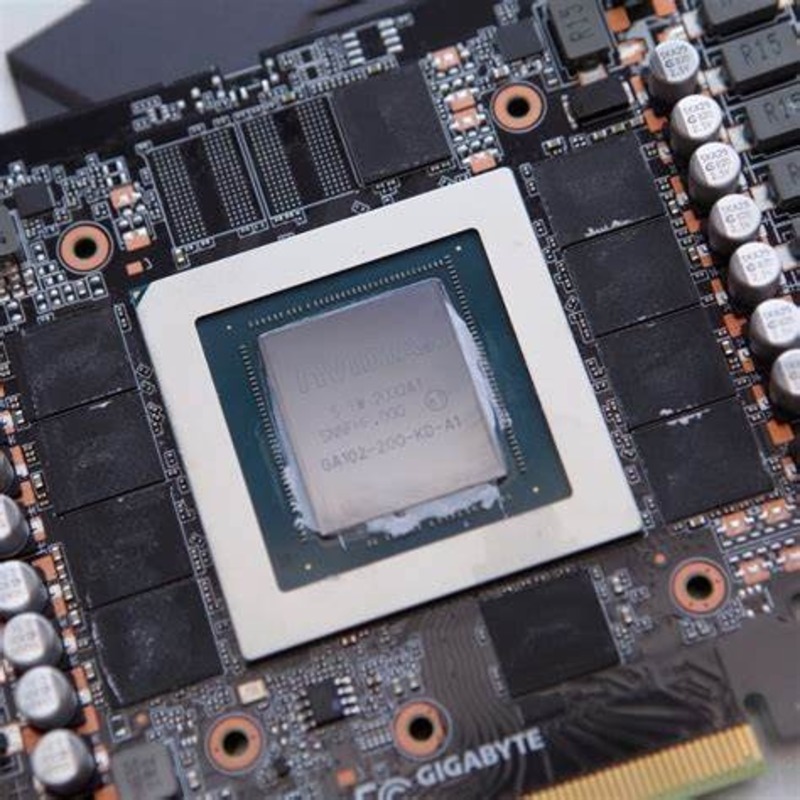
- Remove Old Paste: Gently scrape off any residual thermal paste from the GPU chip and the heatsink with a plastic tool.
- Clean Surfaces: Wipe the surfaces with isopropyl alcohol and a microfiber cloth to remove any leftover paste and impurities.
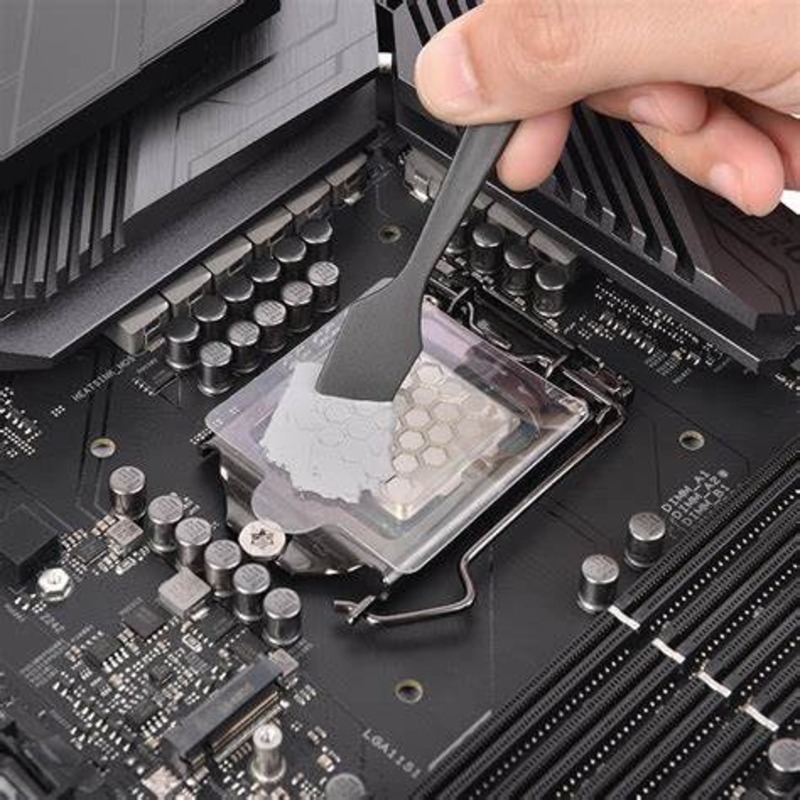
- Apply New Paste: Squeeze a small, pea-sized amount of thermal paste onto the center of the GPU chip.
- Spread Evenly: Use a plastic tool or your finger inside a plastic bag to spread the paste evenly across the surface of the chip.
- Reassemble: Carefully place the heatsink back onto the GPU, ensuring it sits evenly to avoid air pockets.
- Secure Heatsink: Tighten the screws diagonally across the heatsink to ensure even pressure and distribution.
By reapplying thermal paste, you restore the efficient thermal connection between the GPU and the heatsink. This is essential for maintaining optimal temperatures and performance of your GPU. Proceed to the next step only when the thermal paste is applied correctly and the heatsink is securely reassembled.
Tips for Maintaining GPU Efficiency Post-Cleaning
After you’ve learned how to clean GPU components, it’s vital to keep them working efficiently. Following the cleaning, these tips will help you maintain your GPU in top condition. Stick to a maintenance schedule, check temperatures regularly, and ensure good case airflow. Here are straightforward ways to maintain your GPU’s efficiency after cleaning:
- Stick to a Cleaning Schedule: Routine cleaning is crucial. Mark your calendar every 3–6 months for GPU maintenance. It keeps the dust at bay and prevents overheating.
- Monitor GPU Temperatures: Use software tools to track your GPU’s temperature. High readings may signal it’s time to clean again or improve airflow.
- Optimize Airflow: Ensure your PC case has good airflow. It helps keep the GPU cool. Rearrange cables and components if necessary to avoid blocking air paths.
- Update Drivers: Keep your GPU drivers updated. New updates can improve efficiency and stability for better performance.
- Avoid Overclocking: Pushing your GPU beyond its limits generates extra heat. If you’re not an expert, it’s best to avoid overclocking to maintain its lifespan.
- Inspect Fans Regularly: Check your GPU fans now and then. Make sure they’re running smoothly and not making excess noise.
- Consider Additional Cooling: If you live in a hot climate or run intensive tasks, extra cooling might help. Think about adding case fans or a dedicated GPU cooler.
By following these tips, you can maintain your GPU’s efficiency and extend its life. Regular upkeep, paired with good habits, ensures your GPU keeps running smoothly.
Troubleshooting Common Issues After Cleaning
After a thorough GPU clean-up, sometimes issues may arise. Tackling them effectively is the final step in maintenance. Here are common problems and their quick fixes:
- GPU Not Detected: Ensure the GPU is correctly seated in the PCIe slot. Recheck all connections.
- Overheating: If temperatures rise post-cleaning, check if the thermal paste is properly applied. Also, ensure the heatsink is securely reattached.
- Fan Noise: Noisy fans after cleaning could indicate they’re misaligned. Double-check and adjust them if necessary.
- Computer Crashes: This could be due to loose connections or damaged components. Reinspect your installation for any oversight.
- Reduced Performance: If the GPU underperforms, make sure the drivers are up to date. Roll back to an earlier version if the issue persists.
By addressing these common post-cleaning issues, you preserve your GPU’s health. This ensures smooth operation and optimal gaming or work performances. Remember, if issues continue after these checks, consulting a professional or the manufacturer might be necessary. Stick to the outlined steps, and your GPU will thank you with consistent, reliable service.